

Ciabatta is one of those breads that looks impressive but feels wonderfully simple once you know the rhythm. This sourdough version brings that classic open crumb, feather-light texture, and delicate crisp crust. It’s perfect for sandwiches, panini, or tearing into pieces for dunking in olive oil.
With a strong starter and a little patience, you’ll get bakery-style results at home. No special mixer needed—just a bowl, a scraper, and your hands.
What Makes This Recipe So Good
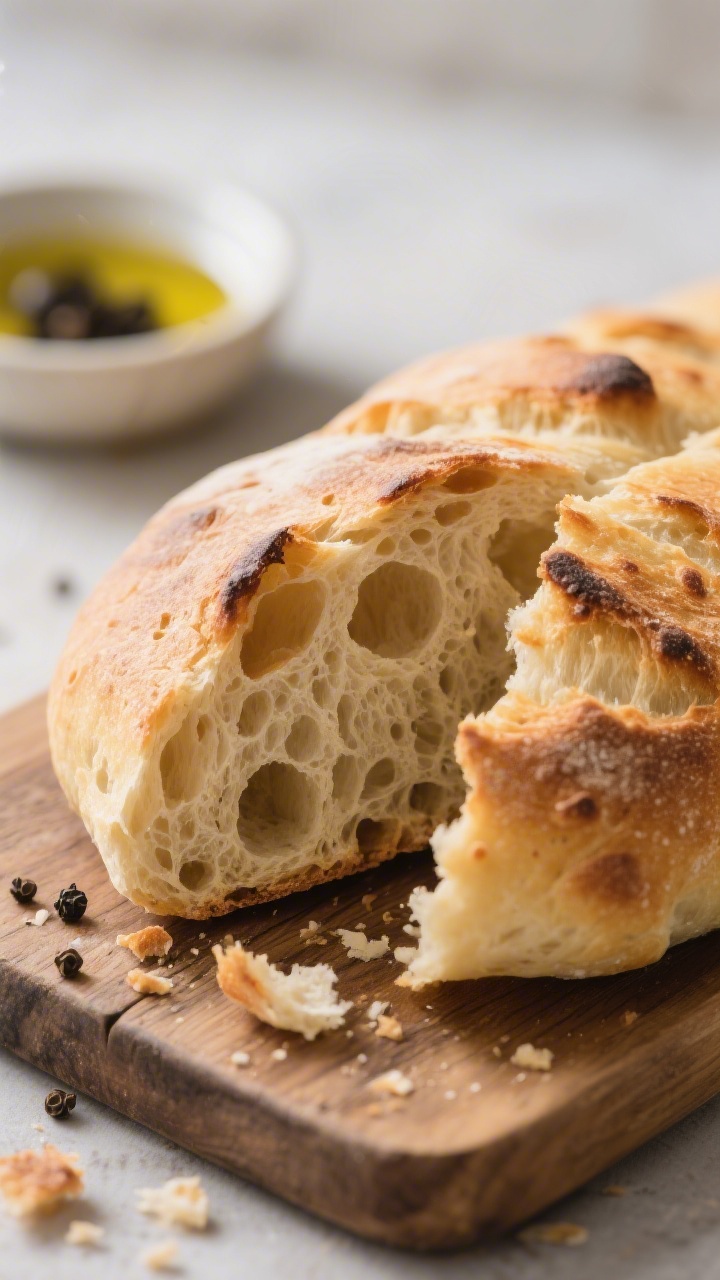
- Ultra-light texture: High hydration and gentle handling create big, irregular air pockets and a cloud-soft interior.
- Bold flavor, simple ingredients: The sourdough adds mild tang and depth without added yeast or sugar.
- No-knead approach: Stretch-and-folds build gluten strength without hard work.
- Flexible timing: The dough can chill overnight, so you can bake on your schedule.
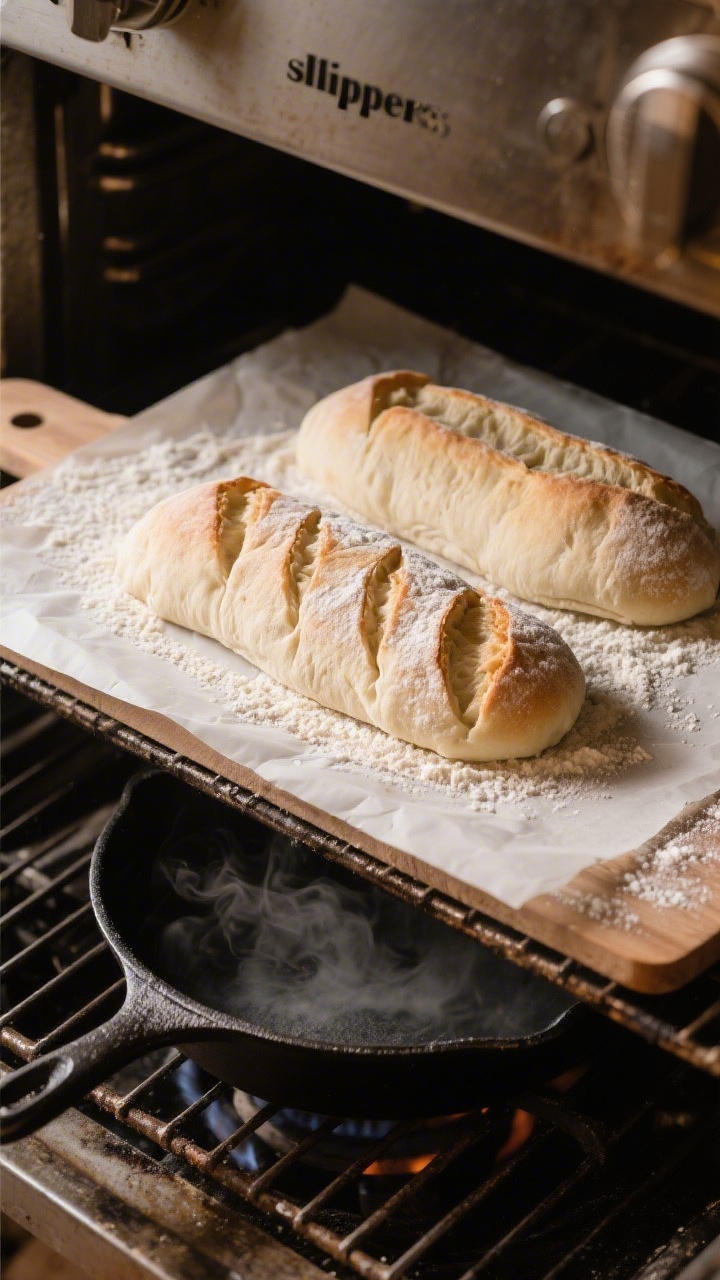
- Versatile loaf shape: Rustic slippers that are easy to shape and perfect for slicing or tearing.
What You’ll Need
- Active 100% hydration sourdough starter: Bubbly and recently fed. You’ll need 150 g.
- Bread flour: 450 g for structure and chew.
- All-purpose flour: 150 g to keep the crumb tender.
- Water: 500–540 g, lukewarm (about 80–85°F / 27–29°C).Start with 500 g and add as needed.
- Fine sea salt: 12 g (about 2 teaspoons) for flavor and gluten strength.
- Olive oil (optional): 1 tablespoon for added suppleness and fragrance.
- Semolina or rice flour: For dusting the work surface and parchment.
Instructions
- Check your starter: Feed your starter 4–8 hours before mixing. It should double, smell pleasantly tangy, and pass the float test. If it doesn’t, wait or feed again.
- Mix the dough (autolyse): In a large bowl, combine bread flour, all-purpose flour, and 500 g water.Stir until no dry bits remain. Cover and rest 30–45 minutes to hydrate the flour and start gluten formation.
- Add starter and salt: Add 150 g active starter, 12 g salt, and the olive oil if using. With wet hands, pinch and fold the dough until everything is evenly combined.If the dough feels very stiff, add up to 40 g more water a little at a time.
- First rest: Cover and let sit for 30 minutes at warm room temperature (75–78°F / 24–26°C). The dough should relax and feel smoother.
- Build strength with stretch-and-folds: Perform 3–4 rounds of stretch-and-folds over 2 hours, spaced 30 minutes apart. To do this, wet your hand, grab one edge, stretch up, and fold it over.Turn the bowl and repeat 3–4 times per round. The dough will go from shaggy to elastic.
- Bulk fermentation: After the last fold, cover and let rise until puffy, jiggly, and increased by about 60–80%. This can take 2–4 hours depending on temperature.Look for bubbles along the sides and a soft, aerated feel when you jiggle the bowl.
- Cold retard (optional but recommended): For deeper flavor and easier handling, refrigerate the dough for 8–16 hours. Cover well to prevent drying. If skipping this step, proceed directly to shaping.
- Prepare for shaping: Generously dust a work surface and a piece of parchment with semolina or rice flour.Gently tip the dough onto the floured surface, trying not to deflate it.
- Divide: With a floured bench scraper, cut the dough into two equal rectangles. Handle carefully to preserve gas inside; avoid pressing down.
- Pre-shape: Lightly flour your hands. Gently stretch each piece into a rough rectangle, then fold the short ends toward the center like a letter.Turn seam-side down and rest 20 minutes. This helps the dough relax and hold shape.
- Final shape (the “slipper”): Flip each piece seam-side up, then carefully stretch into a longer rectangle, about 10–12 inches. Fold a third of the long side over the center, then the other third on top, like folding a brochure.Flip seam-side down onto the floured parchment. Don’t worry about perfect symmetry—rustic is ideal.
- Proof: Cover loosely and proof 30–60 minutes at room temperature. When ready, the dough will look slightly puffed and spring back slowly when poked with a floured finger.
- Preheat the oven: Place a baking steel or stone on the center rack.Preheat to 475°F (245°C) for at least 45 minutes. Place a cast-iron skillet or metal pan on a lower rack for steam.
- Load with steam: Slide the parchment with the loaves onto the hot stone/steel. Carefully pour a cup of hot water into the lower pan and close the door quickly to trap steam.
- Bake: Bake 12 minutes with steam.Vent the oven (remove the pan if safe or crack the door briefly), reduce to 450°F (232°C), and bake another 12–16 minutes until deep golden brown. Internal temperature should be around 208–210°F (97–99°C).
- Cool: Transfer to a rack and cool at least 45 minutes before slicing. The crumb sets as it cools; cutting too soon compresses it.
How to Store
- Room temperature: Keep whole loaves cut-side down on a board or in a paper bag for up to 2 days.Avoid plastic—it softens the crust.
- Freezer: Slice, wrap tightly, and freeze up to 2 months. Toast straight from frozen for best texture.
- Refresh the crust: If the crust softens, reheat at 350°F (175°C) for 8–10 minutes.
Health Benefits
- Natural fermentation: Sourdough fermentation can make gluten and starches easier to digest for some people.
- Lower glycemic impact: Organic acids from the starter slow starch digestion, which may lead to steadier energy.
- Fewer additives: Just flour, water, salt, and starter—no commercial yeast or preservatives.
- Mineral absorption: Fermentation can reduce phytic acid, potentially improving mineral availability.
Pitfalls to Watch Out For
- Underactive starter: A weak starter leads to flat loaves. Make sure it’s bubbly and recently fed.
- Overproofing: If the dough doubles and then collapses, you’ve gone too far.Aim for puffy and jiggly, not ballooned.
- Rough handling: Pressing or kneading during shaping knocks out air. Be gentle and use a scraper to move dough.
- Too much flour in shaping: Excess flour prevents seams from sealing and can dry out the surface. Use just enough to prevent sticking.
- Weak bake: A cool oven or no steam equals dense crumb and pale crust.Preheat well and use steam early.
Recipe Variations
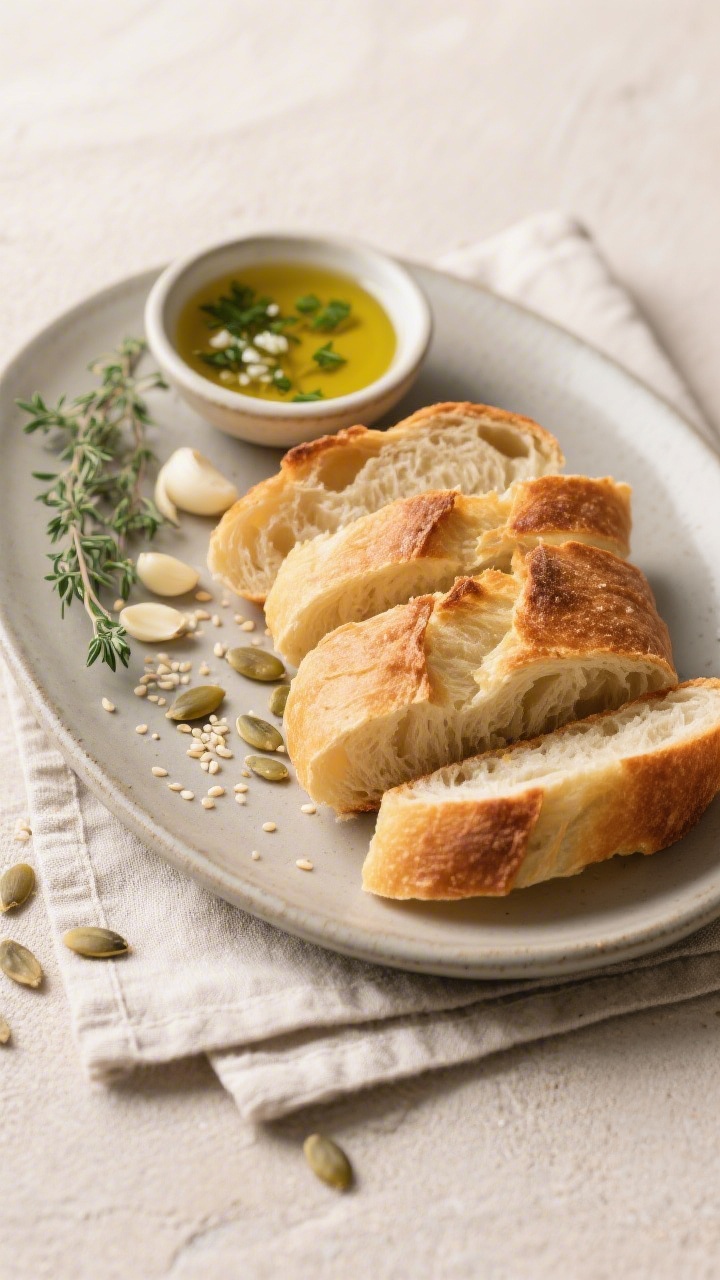
- Olive and Herb: Fold in 1/2 cup chopped pitted olives and 1–2 tablespoons chopped rosemary or thyme during the second stretch-and-fold.
- Seeded Ciabatta: Add 2 tablespoons each of toasted sesame, sunflower, and pumpkin seeds during bulk. Sprinkle extra seeds on top before baking.
- Whole Wheat Boost: Swap 100–150 g of the all-purpose flour with whole wheat. Add 10–20 g more water if needed.
- Garlic Oil Finish: Brush hot loaves with a mix of olive oil, grated garlic, and parsley for a fragrant crust.
- Mini Ciabattas: Divide into 4–6 pieces and shorten the second bake by 3–5 minutes.
FAQ
How do I know my dough is hydrated enough?
The dough should feel soft, slightly sticky, and elastic after a few folds.
If it’s stiff and tears easily, add a splash of water. If it’s soupy and can’t hold any shape, it’s too wet—dust lightly with flour during shaping, but avoid over-correcting.
Can I use only all-purpose flour?
Yes, but expect a slightly softer structure and a bit less chew. Reduce the water by 10–20 g to start, then adjust as needed to reach a tacky, extensible dough.
Do I need a baking stone or steel?
They help with oven spring and a crisp bottom crust, but you can bake on an inverted preheated sheet pan.
Preheat thoroughly and keep the steam step for best results.
What if I don’t want an overnight retard?
You can bake the same day. Watch the proof closely and bake when the dough looks puffy and airy. Flavor will be milder, and the dough may be a bit stickier to handle.
Why is my crumb tight?
Common causes include under-proofing, a weak starter, rough shaping, or insufficient steam.
Also check that your oven is truly at temperature and that you didn’t deflate the dough while moving it.
How sour will this bread taste?
It’s gently tangy, not sharp. For more tang, use a longer cold retard or a stiffer starter. For a milder flavor, shorten the retard or bake the same day.
Can I add commercial yeast?
You can add 1/2 teaspoon instant yeast for insurance.
Fermentation will speed up, so shorten bulk and proof times and watch the dough rather than the clock.
Final Thoughts
Light, airy sourdough ciabatta is all about balance: wet dough, gentle hands, and solid heat. Once you get a feel for the dough’s softness and bounce, the process becomes second nature. Keep your starter lively, trust the visual cues, and let the oven do its magic.
The result is a tender, open crumb with a delicate crust that’s right at home in a sandwich, under a drizzle of olive oil, or still warm with butter.
Light Airy Sourdough Ciabatta – Soft, Open Crumb With Crisp Edges
Ingredients
- Active 100% hydration sourdough starter: Bubbly and recently fed. You’ll need 150 g.
- Bread flour: 450 g for structure and chew.
- All-purpose flour: 150 g to keep the crumb tender.
- Water: 500–540 g, lukewarm (about 80–85°F / 27–29°C). Start with 500 g and add as needed.
- Fine sea salt: 12 g (about 2 teaspoons) for flavor and gluten strength.
- Olive oil (optional): 1 tablespoon for added suppleness and fragrance.
- Semolina or rice flour: For dusting the work surface and parchment.
Instructions
- Check your starter: Feed your starter 4–8 hours before mixing. It should double, smell pleasantly tangy, and pass the float test. If it doesn’t, wait or feed again.
- Mix the dough (autolyse): In a large bowl, combine bread flour, all-purpose flour, and 500 g water. Stir until no dry bits remain. Cover and rest 30–45 minutes to hydrate the flour and start gluten formation.
- Add starter and salt: Add 150 g active starter, 12 g salt, and the olive oil if using. With wet hands, pinch and fold the dough until everything is evenly combined. If the dough feels very stiff, add up to 40 g more water a little at a time.
- First rest: Cover and let sit for 30 minutes at warm room temperature (75–78°F / 24–26°C). The dough should relax and feel smoother.
- Build strength with stretch-and-folds: Perform 3–4 rounds of stretch-and-folds over 2 hours, spaced 30 minutes apart. To do this, wet your hand, grab one edge, stretch up, and fold it over. Turn the bowl and repeat 3–4 times per round. The dough will go from shaggy to elastic.
- Bulk fermentation: After the last fold, cover and let rise until puffy, jiggly, and increased by about 60–80%. This can take 2–4 hours depending on temperature. Look for bubbles along the sides and a soft, aerated feel when you jiggle the bowl.
- Cold retard (optional but recommended): For deeper flavor and easier handling, refrigerate the dough for 8–16 hours. Cover well to prevent drying. If skipping this step, proceed directly to shaping.
- Prepare for shaping: Generously dust a work surface and a piece of parchment with semolina or rice flour. Gently tip the dough onto the floured surface, trying not to deflate it.
- Divide: With a floured bench scraper, cut the dough into two equal rectangles. Handle carefully to preserve gas inside; avoid pressing down.
- Pre-shape: Lightly flour your hands. Gently stretch each piece into a rough rectangle, then fold the short ends toward the center like a letter. Turn seam-side down and rest 20 minutes. This helps the dough relax and hold shape.
- Final shape (the “slipper”): Flip each piece seam-side up, then carefully stretch into a longer rectangle, about 10–12 inches. Fold a third of the long side over the center, then the other third on top, like folding a brochure. Flip seam-side down onto the floured parchment. Don’t worry about perfect symmetry—rustic is ideal.
- Proof: Cover loosely and proof 30–60 minutes at room temperature. When ready, the dough will look slightly puffed and spring back slowly when poked with a floured finger.
- Preheat the oven: Place a baking steel or stone on the center rack. Preheat to 475°F (245°C) for at least 45 minutes. Place a cast-iron skillet or metal pan on a lower rack for steam.
- Load with steam: Slide the parchment with the loaves onto the hot stone/steel. Carefully pour a cup of hot water into the lower pan and close the door quickly to trap steam.
- Bake: Bake 12 minutes with steam. Vent the oven (remove the pan if safe or crack the door briefly), reduce to 450°F (232°C), and bake another 12–16 minutes until deep golden brown. Internal temperature should be around 208–210°F (97–99°C).
- Cool: Transfer to a rack and cool at least 45 minutes before slicing. The crumb sets as it cools; cutting too soon compresses it.