How to Tamp Espresso: The Not-So-Secret Secret to a God-Tier Shot
Alright, let’s have a real talk. You’ve invested in a shiny espresso machine. You’re weighing your beans, maybe even single-dosing like a pro. You pull the lever, full of hope, and… what comes out? A sad, sour trickle that makes you wince. Or a bitter, murky puddle that tastes like regret. You’ve dialed in your grind, so what gives?
Friend, I’ve been there. I’ve thrown away more failed shots than I care to admit. And nine times out of ten, the culprit wasn’t my grinder or my beans. It was the step everyone rushes through: tamping.
Tamping is the great equalizer. It’s the simple, physical act that makes or breaks your entire espresso-making ritual. Get it right, and you unlock a symphony of flavor. Get it wrong, and you’re just making expensive, caffeinated mud.
So, grab your portafilter and let’s demystify this together. No jargon, no intimidation—just a straightforward chat on how to tamp espresso like you mean it.
Why Tamping is a Big Freaking Deal (No, Really)
Think of your espresso puck as a tiny, densely packed road. Water, being the lazy thing it is, will always take the path of least resistance. If you have an unevenly tamped puck—lumpy, slanted, or just plain weak—the water will race through the easy channels and avoid the hard, packed areas.
This is what we call channeling. It’s the arch-nemesis of good espresso. It causes:
- Sourness: From the under-extracted areas the water bypassed.
- Bitterness: From the over-extracted areas it decided to hang out in for too long.
- A Messy Mess: You’ll see it sputtering and spraying out of the portafilter like a mini coffee geyser.
A proper tamp creates a uniform, level road. This forces the water to push through every single coffee particle evenly, extracting all the delicious, complex flavors in harmony. It’s the difference between a chaotic mob and a well-organized marching band.
See? I told you it was a big deal.
Gearing Up: Your Tamping Toolkit
You don’t need a lot, but the tools you choose matter. Let’s break down your options.
The Tamper Itself
This is your wand, your Excalibur. Do not, I repeat, do not use the flimsy plastic thing that came free with your machine. It’s basically a toy. You need a proper, heavy, metal tamper.
The two main things to consider are size and base shape.
- Size: This is non-negotiable. You must get a tamper that fits your portafilter basket perfectly. Not kinda-sorta. Perfectly. A 58.5mm tamper for a 58mm basket is the sweet spot for many modern machines. A loose tamper will leave a ring of untamped coffee around the edge, creating an instant channel for water to escape. Measure your basket or check your machine’s specs!
- Base Shape: You’ve got two choices: flat or curved (dome).
- Flat: The classic. The standard. It does a stellar job and is what most people use and recommend. It’s my personal daily driver.
- Curved (Dome): The theory here is that a slightly convex base helps combat channeling by pre-compacting the center of the puck, which often gets less pressure during the tamp. It’s a valid technique, but IMO, it’s a solution to a problem you can fix with better technique and a level tamp. Start with a flat base.
The WDT Tool: Your Secret Weapon
If you want to get really serious (and you should), this is the single biggest game-changer you can add to your routine. A WDT (Weiss Distribution Technique) tool is just a fancy name for a little tool with thin needles.
You use it to break up clumps and evenly distribute the grounds in the portafilter before you tamp. Clumps are the enemy of uniformity. A quick stir with a WDT tool ensures there are no dense pockets or air gaps. You can buy a nice one or, FYI, be like me and make one by sticking acupuncture needles into a wine cork. It works just as well and costs pennies.
The Step-by-Step: How to Tamp Espresso Like a Pro
Okay, theory time is over. Let’s get our hands dirty. Here’s the exact process I follow for every single shot.
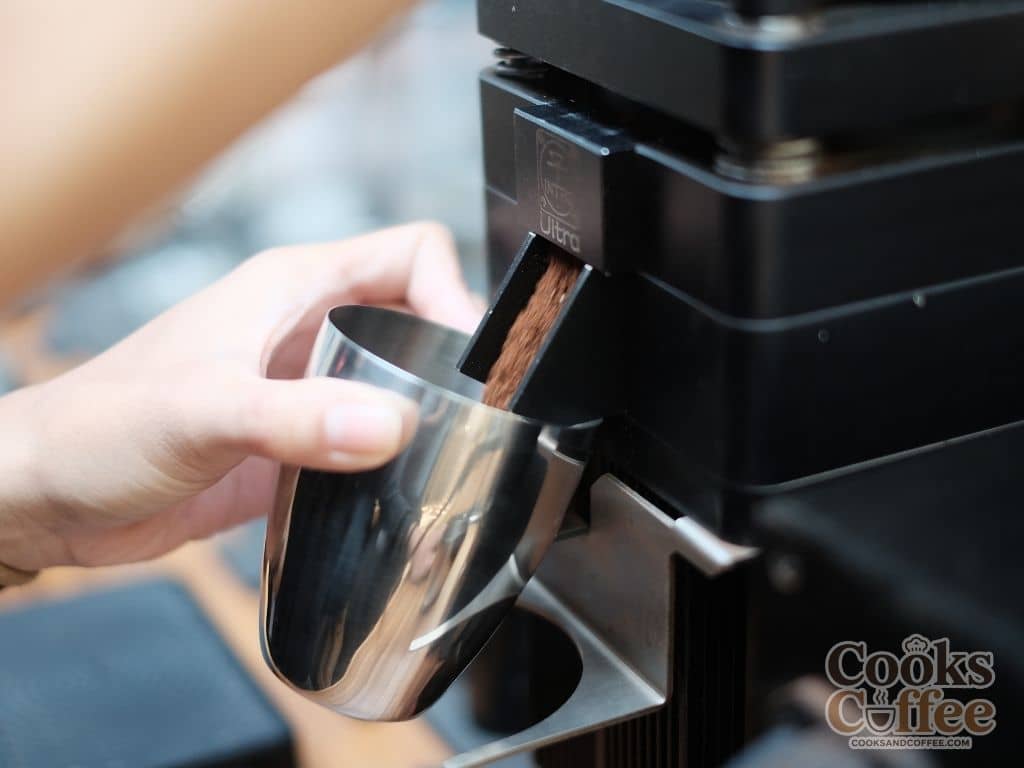
Step 1: Grind, Dose, and Settle
Grind your coffee directly into your portafilter basket. I use a dosing cup on my grinder for zero mess, but going straight in works too. Once you’ve got your dose (usually 18-22 grams for a double basket), you’ll likely have a messy, mounded pile of grounds. This is where channeling is born.
Step 2: Distribute (The Most Important Pre-Tamp Step)
Your goal here is to go from a rocky mountain range to a flat, even prairie. Do not just tamp a big mound of coffee! You’re just pressing those uneven densities into the puck.
There are a million fancy distribution tools (aka “levelers”), but your fingers are all you need. Use your finger to gently sweep the excess grounds from the center out to the edges, creating a roughly level surface. Then, give the portafilter a few solid taps on your countertop. This helps settle the grounds further.
But for the love of all that is caffeinated, use a WDT tool. Swirl those needles through the grounds, lifting from the bottom and breaking up every clump you can find. You’ll immediately see the difference—it goes from clumpy to fluffy and uniform. After WDT, do your finger sweep and tap again. The bed of coffee should look perfectly even and flat. Now you’re ready.
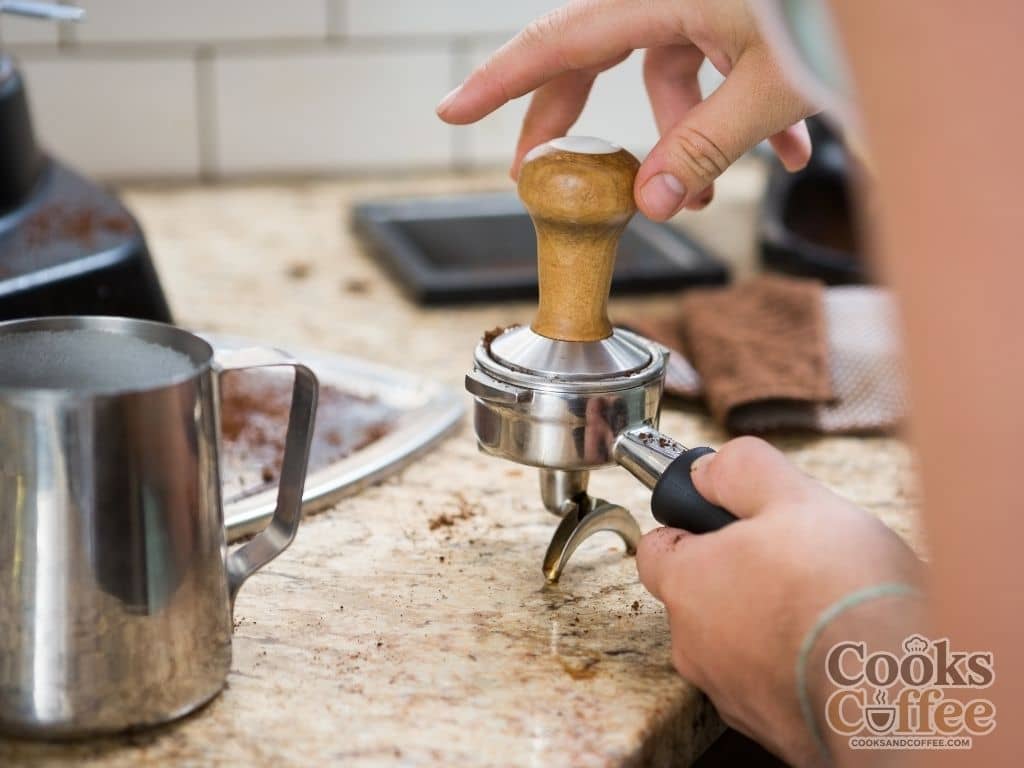
Step 3: The Actual Tamp (It’s Not About Muscle)
Here we go. The main event. Place your portafilter on a stable, flat surface. Your countertop is perfect. Never tamp while holding the portafilter in your hand—you’ll never get it level.
- Grip: Hold your tamper like you’re holding a doorknob. Your fingers should be wrapped around the base, not perched on top. This gives you much better control.
- Position: Place the tamper on the bed of coffee. It should sit flush and level already because you did such a great job distributing.
- Press: Now, apply firm, steady pressure. The big question: how hard? The old myth was 30 pounds of pressure! 50 pounds! You need a calibrated tamper!
Honestly? That’s mostly nonsense. The goal is to compress the coffee as much as it can be compressed. Coffee grounds have a limit; after a certain point, you’re just straining your wrist. I aim for a solid, firm push that fully compacts the puck. You’ll feel it—it goes from soft resistance to a hard stop. That’s it.
- The Polish: Once you’ve reached full compression, give the tamper a slight twist while maintaining downward pressure. This “polish” shears off any stray grounds clinging to the side of the basket and ensures a perfectly smooth top. It also looks cool and makes you feel like a legit barista.
And that’s it. You’re done. The top of your puck should be smooth, level, and look like a perfect little chocolate tablet.
Common Tamping Sins (And How to Avoid Them)
We all make mistakes. Here’s what to watch out for.
- The Side Tamp: You press down at an angle, creating a slope. Water will take the easy route down the shallow side. Result: a sour, uneven shot. Keep your wrist straight and your forearm perpendicular to the counter.
- The Re-Tamp: You tamp, think it’s not good enough, and tamp again. This is a cardinal sin! The first tamp compresses the coffee. The second tamp fractures the already-compressed puck, creating micro-fissures for water to channel through. One firm, confident tamp is all you get.
- The Spinning Vortex of Death: The “polish” is a gentle quarter-turn, not a frantic, full-rotation grind. Over-polishing can actually create channels. Be gentle.
- Neglecting the Basket Edge: That ring of coffee around the edge of your tamper? If you leave it, it’s a guaranteed channel. Your distribution (and a correctly sized tamper) should ensure you tamp the entire surface area.
Does a Calibrated Tamper Solve Everything?
You might see tampers that have a spring-loaded mechanism that “bottoms out” at a specific pressure, like 30 lbs. Are they worth it?
For a beginner, they’re a fantastic training tool. They build muscle memory and teach you what that correct pressure feels like. It takes the guesswork out and ensures you’re consistent.
But is it mandatory? Absolutely not. Once you have the feel for it, you can achieve the exact same result with a standard tamper. Consistency is the real goal, not a specific pressure number. I used one for a year and now I’m back to a basic tamper. I don’t miss it.
The Final Word: It’s All About Consistency
At the end of the day, tamping isn’t some mystical dark art. It’s a simple, mechanical step. But it demands respect.
Your mission isn’t to find one “perfect” tamp. Your mission is to make every tamp identical. Espresso is about controlling variables. You control your dose, your grind size, your yield, and your time. Your tamp needs to be a constant in that equation. When you can tamp the same way, every single time, you finally have the power to truly dial in your shots. Change the grind, not your technique.
So, go forth. Distribute like you care. Tamp with confidence. Polish with flair. Your taste buds will thank you. And the next time you pull a shot that’s pure, syrupy, sweet bliss, you’ll know it was because you nailed the fundamentals.
Now, if you’ll excuse me, all this talk of espresso has made me need one. Happy tamping! 🙂