
Easter sugar cookies bring a little color and sweetness to the table, and they’re easier to make than you might think. These cookies bake up soft in the center with lightly crisp edges, just right for decorating with pastel icing and sprinkles. Whether you’re baking with kids or prepping a pretty dessert plate for brunch, this recipe keeps things simple and reliable.
You’ll get a dough that rolls well, holds its shape, and tastes like pure vanilla-butter goodness. Make a batch a day ahead, and you’ll have a festive treat ready when guests arrive.
What Makes This Special
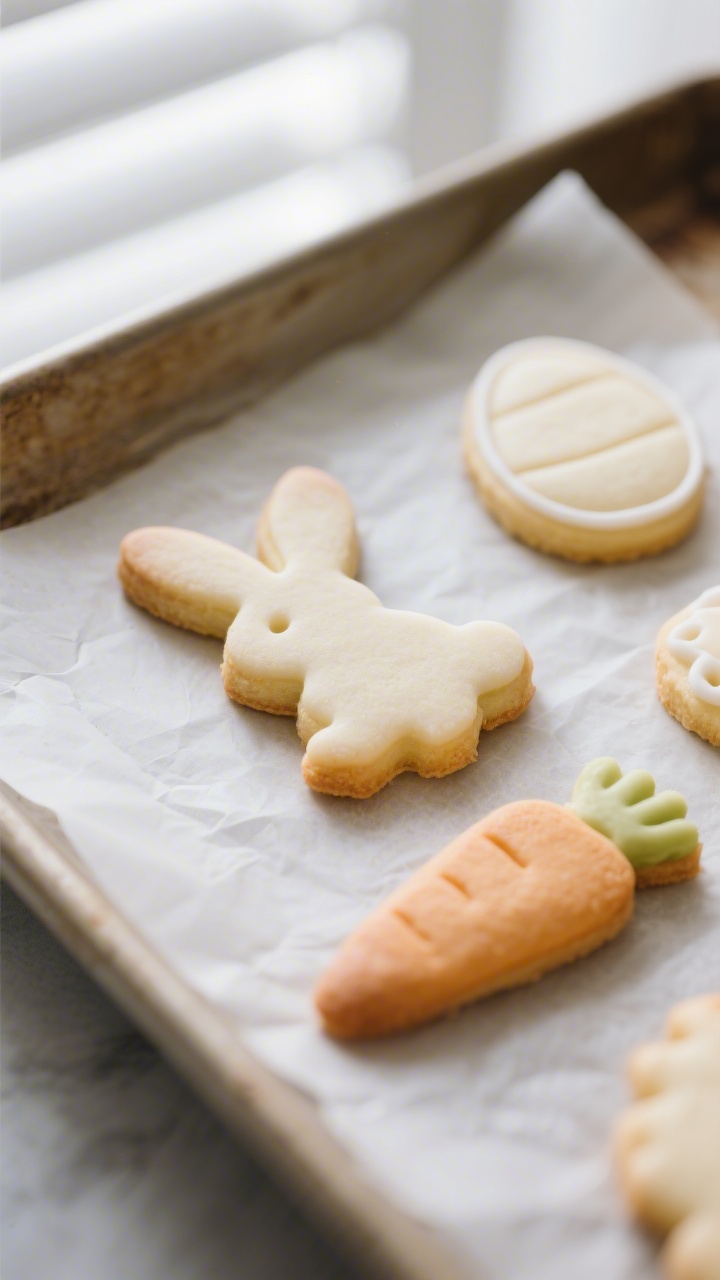
These Easter sugar cookies are designed to hold their shape, so your bunnies, eggs, and carrots come out crisp and clean after baking. The dough mixes up in minutes and chills quickly, which means less waiting and more decorating.
A hint of almond extract adds a bakery-style flavor that pairs beautifully with vanilla and butter. The icing is a simple, quick-setting glaze that’s easy to tint in soft spring colors and firm enough for layering. Best of all, the texture lands right in the sweet spot: tender, not crumbly, and soft without being cakey.
Shopping List
- All-purpose flour – the base for sturdy, tender cookies
- Baking powder – just enough lift without puffing out shapes
- Fine sea salt – balances sweetness
- Unsalted butter (room temperature)
- Granulated sugar
- Large eggs
- Vanilla extract
- Almond extract (optional but recommended)
- Whole milk or cream – for the icing and, if needed, the dough
- Powdered sugar – for the icing
- Light corn syrup (optional; helps icing set with a slight sheen)
- Food coloring – gel or liquid in pastel shades
- Sprinkles – pastel jimmies, nonpareils, or sugar pearls
How to Make It

- Cream the butter and sugar: In a large bowl, beat softened butter with granulated sugar until light and fluffy, 2–3 minutes.
This builds air for a tender crumb.
- Add eggs and extracts: Beat in eggs one at a time, then mix in vanilla and almond extract. Scrape down the bowl so everything blends evenly.
- Combine dry ingredients: Whisk flour, baking powder, and salt in a separate bowl. Add to the butter mixture in two additions, mixing on low just until no dry streaks remain.
- Adjust texture if needed: The dough should be soft but not sticky.
If it clings heavily to your fingers, add 1–2 tablespoons of flour. If it seems dry or crumbly, mix in 1 tablespoon of milk.
- Chill: Divide dough into two disks, wrap, and chill for 45–60 minutes. Chilled dough rolls smoothly and holds its shape in the oven.
- Roll and cut: Preheat the oven to 350°F (175°C).
On a lightly floured surface, roll dough to about 1/4 inch thick. Cut out shapes with Easter-themed cutters and transfer to a parchment-lined baking sheet.
- Bake: Bake 9–12 minutes, depending on size. Look for set edges and a soft center without browning.
Let cool on the sheet for 5 minutes, then move to a rack to cool completely.
- Make the icing: In a bowl, whisk powdered sugar with a pinch of salt, a splash of milk, vanilla, and a teaspoon of corn syrup (optional) until smooth and thick but pourable. Divide and tint with food coloring.
- Decorate: Use a piping bag or a zip-top bag with the corner snipped to outline and flood cookies. Add sprinkles right away so they stick.
Let icing set 2–4 hours.
- Serve or store: Enjoy once the icing is firm to the touch. For layered designs, let the first color dry before adding details.
Storage Instructions
Keep decorated cookies in an airtight container at room temperature for up to 5 days. Place parchment between layers to protect the icing.
For longer storage, freeze undecorated cookies or dough. The baked cookies freeze well for up to 2 months; thaw at room temperature before icing. Dough disks can be frozen up to 2 months; thaw in the fridge overnight, then roll and bake as usual.

Health Benefits
These are a treat, but there are a few small wins.
Making cookies at home lets you control ingredients—no preservatives, and you can reduce the icing or choose natural food colorings. Portion size is easier when you cut smaller shapes. Pairing a cookie with fruit or serving them after a balanced meal helps keep sugar spikes in check.
You can also experiment with half whole-wheat pastry flour for a bit more fiber without losing tenderness.
What Not to Do
- Don’t skip chilling the dough. Warm dough spreads and blurs the shapes.
- Don’t overbake. Brown edges mean dry cookies. Pull them when set and pale.
- Don’t overload with flour while rolling. Too much can make cookies tough. Dust lightly and lift/turn the dough as you roll.
- Don’t add too much food coloring. A tiny amount goes far, especially with gel colors.
- Don’t stack decorated cookies too soon. Icing needs time to set or you’ll smudge the designs.
Alternatives
- Flavor swaps: Replace almond extract with lemon zest and juice in the icing for a fresh spring twist.
Or try orange zest in the dough.
- Dairy-free: Use a high-quality dairy-free butter and a plant-based milk. Choose sprinkles labeled vegan if needed.
- Gluten-free: Use a 1:1 gluten-free baking flour blend with xanthan gum. Chill a bit longer; GF dough softens quickly.
- Royal icing option: For ultra-crisp details, make royal icing with meringue powder instead of the simple glaze.
It dries harder and stacks better.
- Natural colors: Tint icing with beet powder (pink), matcha (pale green), turmeric (yellow), or blueberry powder (lavender).
- No-cookie-cutter method: Roll dough into balls, flatten slightly with a glass, and decorate with sanding sugar for a simpler look.
FAQ
How thick should I roll the dough?
About 1/4 inch is ideal. Thinner cookies brown too quickly; thicker ones may puff and lose detail. Keep the thickness even across the sheet for consistent baking.
Why did my cookies spread in the oven?
Usually the dough was too warm or had too much butter.
Chill the cut shapes on the baking sheet for 10 minutes before baking, and be sure to measure flour correctly.
Can I make the dough ahead?
Yes. Refrigerate the dough up to 48 hours or freeze up to 2 months. If refrigerated, let it sit at room temperature for 10–15 minutes until it’s rollable, but still cool.
What if I don’t have almond extract?
Just use extra vanilla.
For a twist, add a little lemon or orange zest to the dough for a bright, spring flavor.
How long does the icing take to dry?
Plan on 2–4 hours at room temperature for a simple glaze, longer if it’s humid or if you’ve made thicker designs. Royal icing typically dries faster and harder.
How do I get clean edges on cut-out cookies?
Work with well-chilled dough, dust your cutters lightly with flour, and use a sharp, metal cutter. Lift dough scraps away from shapes before transferring them to the sheet.
Can kids help with this recipe?
Absolutely.
Let them cut shapes, add sprinkles, and paint on icing with small brushes. Prep and chill the dough ahead so the fun starts right away.
What’s the best way to color icing pastel?
Start with a toothpick’s tip of gel color and build slowly. White icing plus just a tiny touch of color gives that soft, Easter look.
In Conclusion
Easter sugar cookies are a cheerful, make-ahead dessert that invites creativity without adding stress.
With a reliable dough, a quick-setting icing, and simple decorations, you can fill a platter with pretty pastels in an afternoon. Keep the process relaxed, let the cookies stay soft and pale, and enjoy the baking as much as the sharing. This is the kind of recipe that turns into a yearly tradition—and a sweet highlight of spring.

Easter Sugar Cookies – Soft, Buttery, and Perfect for Decorating
Ingredients
- All-purpose flour – the base for sturdy, tender cookies
- Baking powder – just enough lift without puffing out shapes
- Fine sea salt – balances sweetness
- Unsalted butter (room temperature)
- Granulated sugar
- Large eggs
- Vanilla extract
- Almond extract (optional but recommended)
- Whole milk or cream – for the icing and, if needed, the dough
- Powdered sugar – for the icing
- Light corn syrup (optional; helps icing set with a slight sheen)
- Food coloring – gel or liquid in pastel shades
- Sprinkles – pastel jimmies, nonpareils, or sugar pearls
Instructions
- Cream the butter and sugar: In a large bowl, beat softened butter with granulated sugar until light and fluffy, 2–3 minutes. This builds air for a tender crumb.
- Add eggs and extracts: Beat in eggs one at a time, then mix in vanilla and almond extract. Scrape down the bowl so everything blends evenly.
- Combine dry ingredients: Whisk flour, baking powder, and salt in a separate bowl. Add to the butter mixture in two additions, mixing on low just until no dry streaks remain.
- Adjust texture if needed: The dough should be soft but not sticky. If it clings heavily to your fingers, add 1–2 tablespoons of flour. If it seems dry or crumbly, mix in 1 tablespoon of milk.
- Chill: Divide dough into two disks, wrap, and chill for 45–60 minutes. Chilled dough rolls smoothly and holds its shape in the oven.
- Roll and cut: Preheat the oven to 350°F (175°C). On a lightly floured surface, roll dough to about 1/4 inch thick. Cut out shapes with Easter-themed cutters and transfer to a parchment-lined baking sheet.
- Bake: Bake 9–12 minutes, depending on size. Look for set edges and a soft center without browning. Let cool on the sheet for 5 minutes, then move to a rack to cool completely.
- Make the icing: In a bowl, whisk powdered sugar with a pinch of salt, a splash of milk, vanilla, and a teaspoon of corn syrup (optional) until smooth and thick but pourable. Divide and tint with food coloring.
- Decorate: Use a piping bag or a zip-top bag with the corner snipped to outline and flood cookies. Add sprinkles right away so they stick. Let icing set 2–4 hours.
- Serve or store: Enjoy once the icing is firm to the touch. For layered designs, let the first color dry before adding details.